Smart Monitoring System
THINGS USED IN THIS PROJECT
| Hardware components: 1.Raspberry Pi Zero
| ||||||
| Software apps | ||||||
 |
| |||||
Project
Description
The goal is to build a small and easy to use device to monitor temperature, humidity, noise levels, luminosity and atmospheric pressure.
The idea is to have multiple devices spread across the city to send environmental data to the AWS IoT platform for processing and analysis. With this real time data , new public services could be offered, for example:
- Trigger alarms in case of dangerous measurements detected
- Finding out the less polluted places in the city at a given time: parks, squares or any public outdoors places.
- Find out high polluted places to avoid
- Find out the measurements from the nearest monitoring device
This device is intended to be used and managed by anyone with no other requirement than an internet connection and an available outdoor place at home: for example, balcony, a window, a roof, garden, etc. . .
Just by plugging the device , it will automatically start sensing and sending data to the cloud.
Software
1.- Java SE applications for the Raspberry to read the sensors and send data to the AWS platform in real time. The Pi4j library will be used.
2.- An admin panel for the users of the device. A web application that will allow to restart /shutdown the device and will show the latest measurements.
3.- Examples of web applications using the AWS platform to provide public services:
- Alarms for dangerous measurements
- Show the measurements of the nearest monitoring device from my location
- Provide measurements historic files and graphics
Part 1 - Preparing the Raspberry Pi
1.1 - Installing the OS
1.- Download the latest Rapbian-Lite image from https://www.raspberrypi.org/downloads/raspbian
2.- Follow the instructions to install the Raspbian in your micro SD card athttps://www.raspberrypi.org/documentation/installation/installing-images/linux.md
Or if you are using Linux you can follow these steps to install Raspbian Lite on your micro SD card:
- Check the device name for your micro SD by running :
df -h
In my case, the device name is /dev/mmcblk0
- Unmount your device with the following command
umount /dev/mmcblk0
- Write Raspbian image to the device , run the following command withroot privileges. Where if is the location of your raspbian img file and of is the sd card device name:
sudo dd bs=4M if=/<path-to-img>/raspbian-jessie-lite.imgof=/dev/mmcblk0
1.2 - Configuring Raspbian
Insert your sd card in the Raspberry , connect it to a monitor using a mini HDMI adapter , connect a keyboard and turn the Raspberry on.
1.- Expand the Filesystem and Enable I2C
- Login as user: pi password: raspberry
- Execute the command
sudo raspi-configin the terminal - Select Expand Filesystem and press Enter
- Select OK and you will return to the main menu
- Select Advanced Options
- Select I2C and press Enter
- Select Yes and press Enter
- Select OK and press Enter
- Select Yes and press Enter
- Select OK and you will return to the main menu
- Select Finish and press Enter
- Select Yes and press Enter to reboot the Raspberry pi
2.- Configure automatic wifi connection
For the raspberry pi to connect automatically to your wifi network , follow the instruction at :https://www.raspberrypi.org/documentation/configuration/wireless/wireless-cli.md
In my case I added the following entry to the /etc/wpa_supplicant/wpa_supplicant.conf file to automaticallyconnect to my wifi network with WPA security , where ssid is mynetwork name and psk is the password:
network={
 ssid="Huawei-HG8245-BF21"
 psk="3219BF21"
 proto=RSN
 key_mgmt=WPA-PSK
 pairwise=TKIP
 auth_alg=OPEN
}
3.- Enable static IP
Now that your Raspberry connects automatically to your wifi network everytime it is tuned on, you need to specify a static IP address to communicate with your Raspberry
Follow the instructions to configure static IP at :https://www.raspberrypi.org/forums/viewtopic.php?f=91&t=49350
In my case, I set the static IP address to 192.168.100.50
My /etc/network/interfaces file looks like this :
auto lo
iface lo inet loopback
iface eth0 inet dhcp
allow-hotplug wlan0
iface wlan0 inet manual
wpa-roam /etc/wpa_supplicant/wpa_supplicant.conf
iface default inet static
address 192.168.100.50
netmask 255.255.255.0
network 192.168.100.0
broadcast 192.168.100.255
gateway 192.168.100.1
4.- Restart the Raspberry
- Shutdown the the Raspberry by executing :
sudo halt
- Remove the keyboard , the HDMI adapter and connect a USB Wifi Adapter
- Turn on the Raspberry
If you performed steps 2 and 3 correctly you should now be able to ssh into the Raspberry
Wait a couple minutes after turning on the Raspberry and then go to step 5
5.- SSH into the Raspberry to install additional software
From a computer connected to your Wifi network ,sse a ssh client software to connect to your Raspberry.
Check more information here:https://www.raspberrypi.org/documentation/remote-access/ssh/
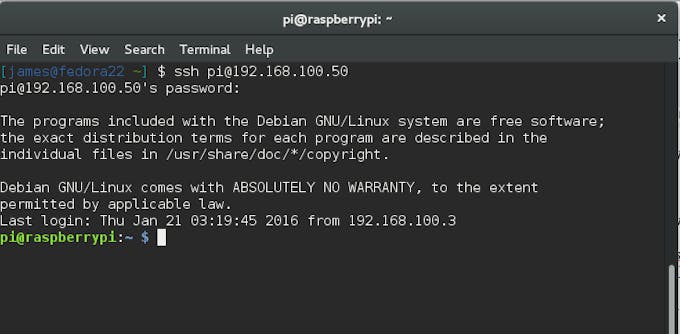
Or if you are using Linux , execute the following command to ssh into the Raspberry
ssh pi@<ip-address>
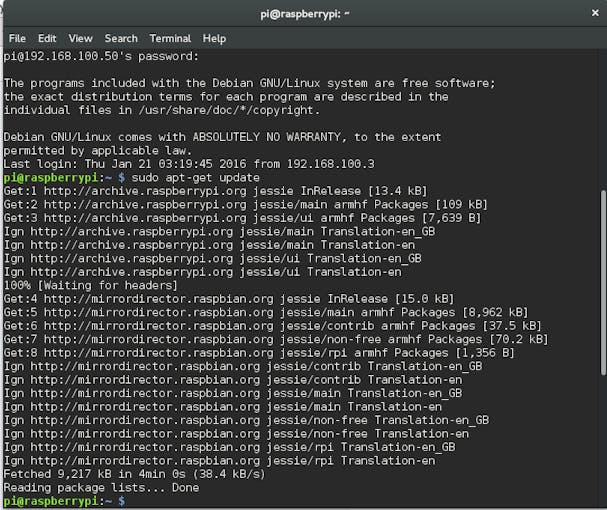
- Update repositories
From the terminal execute:
sudo apt-get update
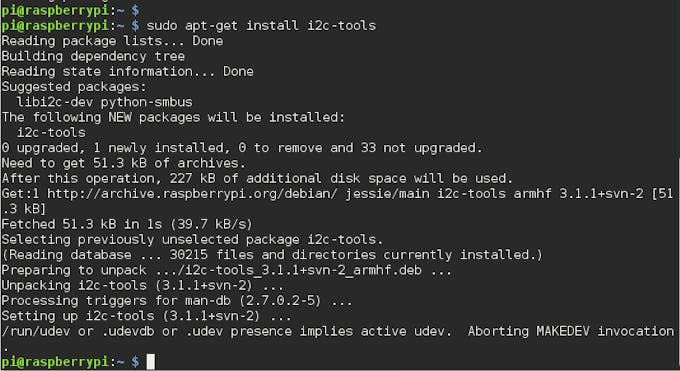
- Install i2c-tools
From the terminal execute:
sudo apt-get install i2c-tools1.3 - Installing the AWS IoT Device SDK for Node.js
SSH into your Rasapberry. From /home/pi , run the following commands
1.- Install the required repositories. Execute the following command
curl -sLS https://apt.adafruit.com/add | sudo bash
2.- Install npm
sudo apt-get install node
3.- Install npm
sudo apt-get install npm
4.- Install the SDK
npm install aws-iot-device-sdk
You should see a folder named node_modules at /home/pi
1.4 - Installing the Java JDK 8
1.- Download the Java JDK from
Make sure to select Linux ARM 32 Hard Float ABI
2.- Transfer the SDK tar.gz file to /home/pi in the Raspberry
If you are using linux you can execute the following command from the directory where you downloaded the SDK
scp jdk-8u65-linux-arm32-vfp-hflt.tar.gz pi@192.168.100.50:/home/pi
3.- On the Raspberry. Uncompress the sdk file
tar -vxzf jdk-8u65-linux-arm32-vfp-hflt.tar.gz
A folder containing the SDK should have been created at /home/pi
Part 2 - Wiring the Sensors and the ADC to the Raspberry PI
2.1 - Description of the Sensors and ADC
The MPL3115A2 Altimeter
This sensor measures pressure, altitude and temperature. It works using the I2C protocol. In this project this sensor is used to measure temperature and pressure. Here is more information about the device:
Official product website
Official Datasheet:
Adafruit C++ Library (Not used in this project but useful as reference)
The TSL2561 Lux Sensor
This is a digital light sensor, it uses the I2C protocol. In this project this sensor is used to measure the Luminosity.
Official product website
Official Datasheet
Adafruit C++ Library (Not used in this project but useful as reference)
The HTU21D-F Humidity Sensor
This is a I2C digital sensor. In this project this sensor is used to measure the Humidity.
Official product website
Official Datasheet
Adafruit C++ Library (Not used in this project but useful as reference)
The MAX4466 Microphone
This is an electret microphone amplifier with adjustable gain. In this project this sensor is used to measure ambient noise (Sound Level Pressure)
Official product website
Official Datasheet
The MPC3008 ADC (Analog to Digital Converter)
The Raspberry pi doesn't have a built-in ADC so we are using the the MPC3008 to convert the analog signal from the MAX4466 Microphone to digital signal. This ADC uses a SPI interface.
Official product website
Official Datasheet
2.2 Wiring
Follow the attached Fritzing diagram to connect the Raspberry , the sensors and the ADC to the breadboard.
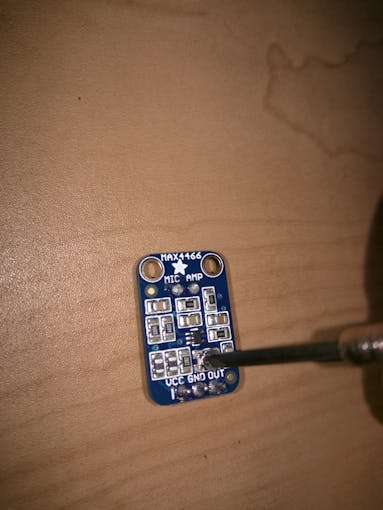
Before wiring the MAX4466 we need to set its gain to the maximum level. To do this notice a a small trimmer pot on the back of the microphone. Place it in front of you and turn it counter clock wise all the way, do this very carefully with a small screwdriver. See the following image as reference
After you do this , proceed to to the wiring as indicated in the Fritzing diagram.
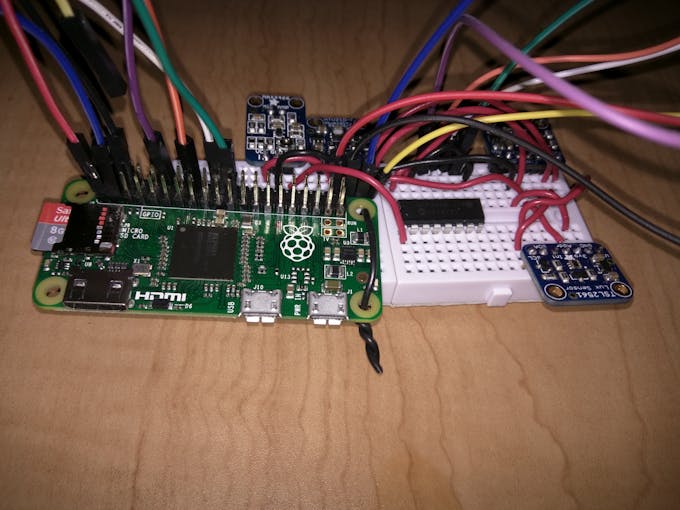
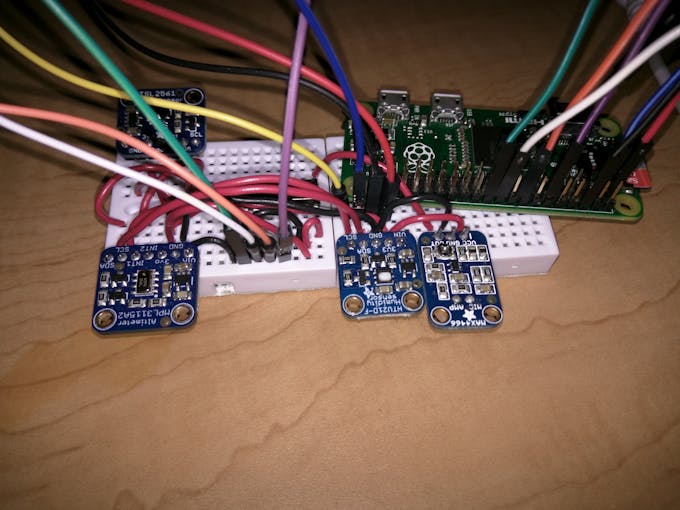
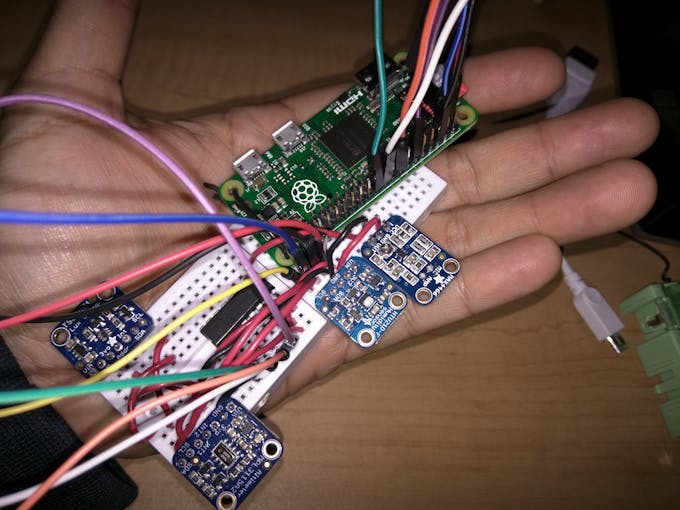
Once you finish the wiring and sensor placement your device should look something like this.
2.3 Verifying the wiring
If all the components were wired correctly , the Raspberry should be able to "see" the sensors.
- SSH into the raspberry and execute the command:
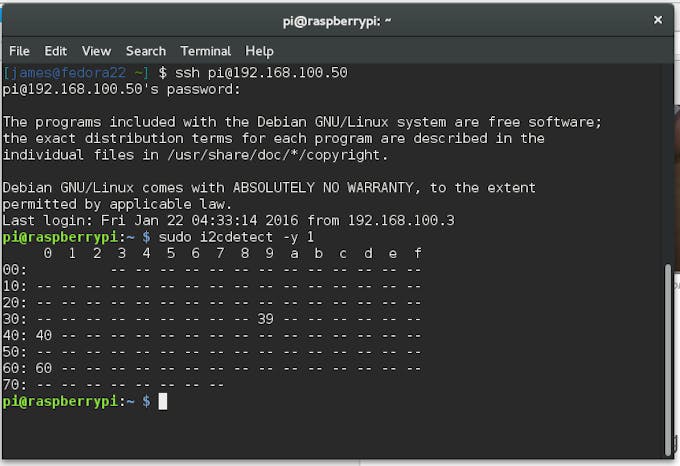
sudo i2cdetect -y 1
You should see the following output
The numbers 39 , 40 and 70 are the I2C addresses for the Altimeter , Lux and Humidity sensors.
Part 3 - Setting AWS IoT
3.1 - Create a thing device
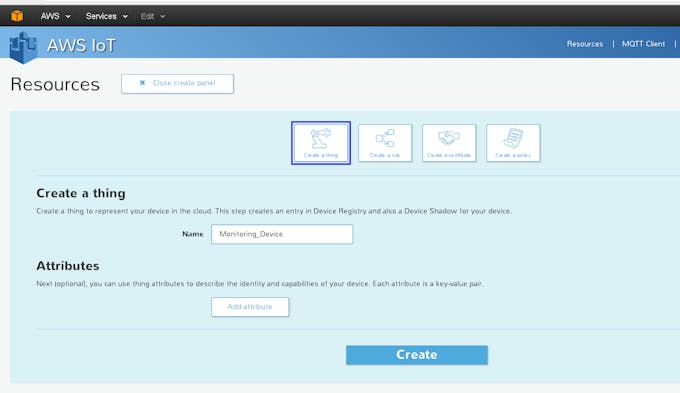
1.- Login to your AWS iot account and click the "Create a resource" button
2.- Click "Create a thing"
3.- Enter a name and click the Create button
In this case , I named it "Monitoring_Device"
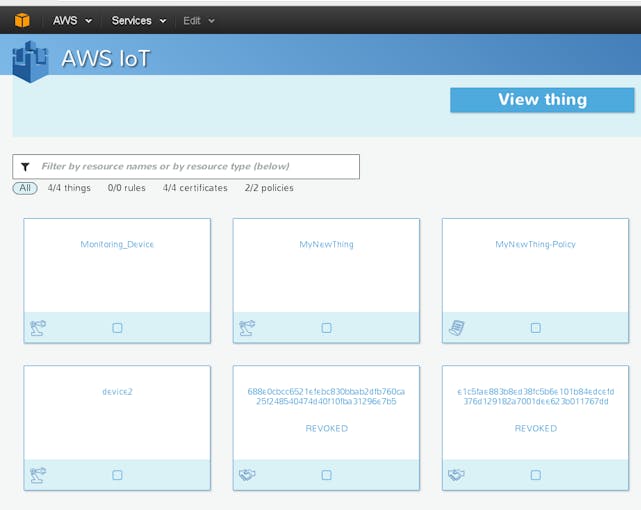
You should now see you device in the main dashboard
3.2 - Create connectivity certificates
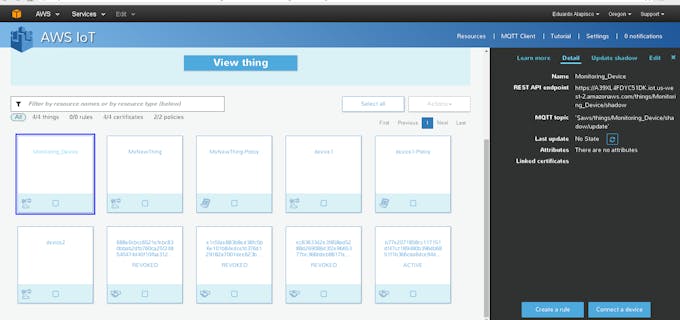
1.- Click the name of your newly created device and a menu on the right should open up
2.- Click the "Select a device" button
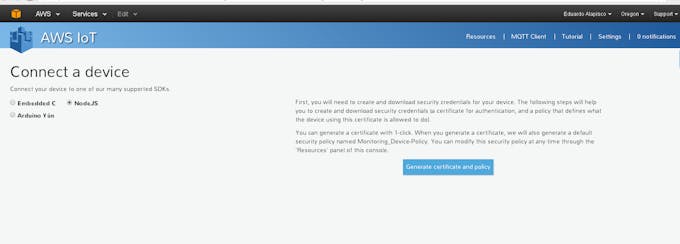
3.- Choose NodeJs and click the "Generate certificate and policy" button
4.- Links to the created certificates will show up. Download the private key and the certificate
5.- Download the root CA certificate from
3.3 .- Copy the certificates to the Raspberry Pi
1.- On the raspberry pi create a folder for the certificates :
/home/pi/certs
2.- Copy the private key , the certificate and the root CA to the raspberry.
If you are using linux you can use scp, example:
scp -r /home/james/Downloads/56ca21d279-private.pem.key pi@192.168.100.50:/home/pi/certs

scp -r /home/james/Downloads/56ca21d279-certificate.pem.crt pi@192.168.100.50:/home/pi/certs

scp -r /home/james/Downloads/VeriSign-Class 3-Public-Primary-Certification-Authority-G5.pem  pi@192.168.100.50:/home/pi/certs
3.- On the Raspberry , rename the root CA certificate to root-CA.crt
mv "VeriSign-Class 3-Public-Primary-Certification-Authority-G5.pem" root-CA.crtPart 4 - Installing the Software
4.1 - Source Code
The software consists on a Java 8 application that reads the sensors and a NodeJs application that communicates with AWS Iot
The main Java application code is located at :
It relies on a java library created for this project located here:
The java app uses a NodeJs script that uses the NodeJS AWS-IoT SDK to send data to the AWS platform
The whole applications are packaged for deployment on the Raspberry Pi here:
4.2 - Deploying the app to the Raspberry
4.2.1 Installing the application
1.- Go to the github project page and select the "Download ZIP" button
2.- Unzip the github project file and copy the AWS-IoT-Smart-Env-Monitoring/dist folder to /home/pi to the Raspberry
3.- Check the application property file at AWS-IoT-Smart-Env-Monitoring/dist/device.properties and make sure that all properties are correct
KEY_PATH : refers to the private certificate you downloaded after creating the AWS thing device
CERT_PATH : refers to the .crt certificate you downloaded after creating the AWS thing device
CA_PATH : refers to the root certificate you downloaded
CLIENT_ID: refers to the AWS thing device name
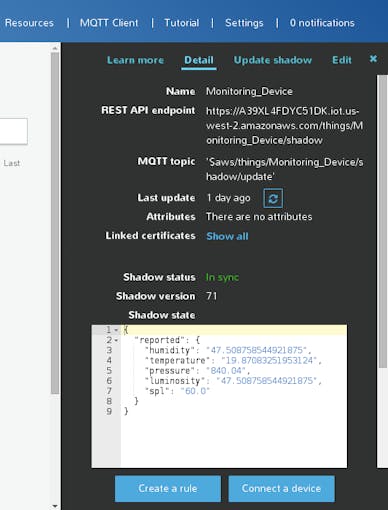
REGION: refers to the region your AWS account is set at. You can check this by selecting your device on the AWS IoT dashboard and checking the REST api end point . In my case my endpoint is https://A39XL4FDYC51DK.iot.us-west-2.amazonaws.com/things/Monitoring_Device/shadow so my endpoint is us-west-2
MEASUREMENT_INTERVAL: refers to how often your application will get data from the sensors and send it to AWS IoT. It is defined in milliseconds. By default its set to 10000 (every 10 seconds)
AWS_SCRIPT: refers to the location of the nodejs script that will upload data to AWS IoT
After deploying all your files, you should now be able to run the application manually by executing the following commands in the raspberry :
cd dist/
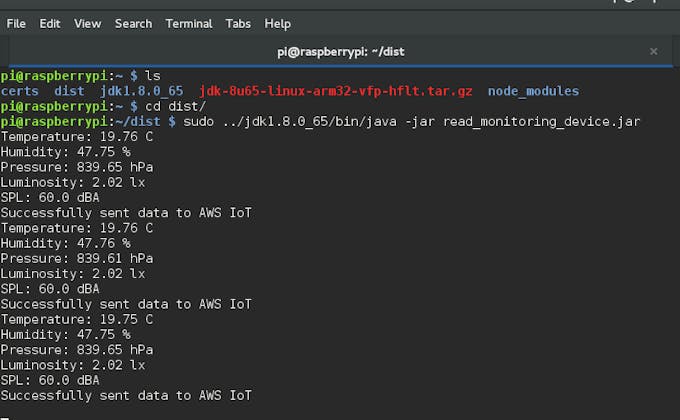
sudo ../jdk1.8.0_65/bin/java -jar read_monitoring_device.jar
Your device should now be sending data to AWS IoT. You should see outputs like this:
If you go to AWS IoT and check your device status you should see the latest update and how many times it has been updated (Shadow versions)
4.2.2 Automatically run the app on boot
To automatically execute the application every time you turn on the Rapsberry . SSH into the raspberry and execute the following commands from /home/pi:
sudo cp dist/device_start /etc/init.d
sudo chmod 755 /etc/init.d/device_start
sudo update-rc.d device_start defaults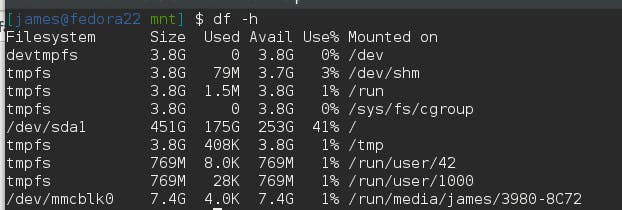

This is called great and awesome blog related to Smart Monitoring System of Temperature and Humidity Sensor, cause on this blog I saw different and a lot of useful information. You have provided the Hi quality content with the help of coding, So I will be happy to share this stuff with my colleagues and other known people.
ReplyDeleteThis comment has been removed by the author.
ReplyDeleteGreat overview of smart monitoring systems!
ReplyDeleteFor anyone exploring practical IoT solutions, I highly recommend checking out UBITracer (https://www.ubitracer.com/) — it’s a compact GPS tracker integrated with temperature, humidity, light, shock, and tilt sensors.
It’s especially useful for cold chain logistics, smart agriculture, and equipment tracking where real-time environmental monitoring is critical.
Worth a look if you're building anything similar!